Michael
Dad & NerdElectronics
Base Concept
So, this is most complex (p)art. But it's also what makes our CamperVAN so unique.
At the end, I wanted to built a "smart" CamperVAN. I've some experience in home automation based on KNX (and others). And I like the idea to have a smart system which
- allows an easy handling
- automates repeating tasks
- distributes energy intelligently
- gives me just one control panel for all devices
- knows the status and can be operated from anywhere
- is secure and reliable
On top it was always in my mind to have just two power sources: 1) Diesel, and 2) electricity, ideally from the sun.
Energy Sources
First, it is tailored to our style of travel. Usually we go to a location, spend max. 1-2 days on the spot and go ahead for the next location. For that I planned with 3 options to get enough energy:
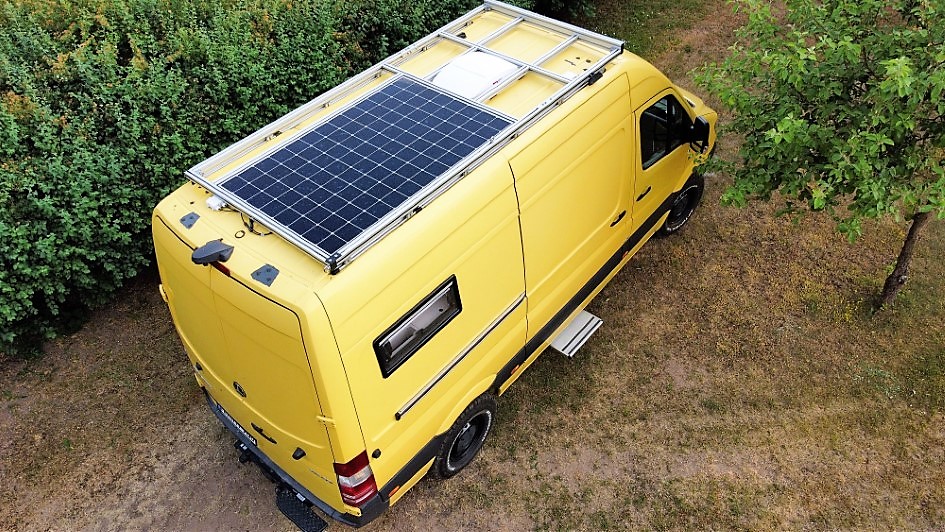
- Solar Panel: SunPower SPR-MAX3-390 390Wp MAXEON 3 mono - this module in particular has one of the highest efficiency rate of 22,3 %, it works pretty well even with clouds on the sky and partial shadows. Combined with the Victron SmartSolar MPPT 100/30* charger it seems to be a dream team to gain as much energy as possible. I've had already situations charging 390 W to my battery (30 A).
- Alternator: B2B Charger VOTRONIC 3329 VCC 1212-90* which can charge up to 90 A from the alternator to my battery. I limited to 75 A due to the factory cables and the factory isolation relay. But it's still a lot. BTW: this charger works with EURO 6 engines. It charges also back to the starter battery with 5 A, once the camper battery is full.
- Shore Power: (just as backup) via my Inverter Ective SSI 25* up to 20 A if connected to shore power (but with some crazy charging algorithms).
- Diesel Heater: the Planar 2D* produces hot air out of Diesel from the regular tank.
Interesting facts: If I drive in the sun, the battery gets charged by 1+2 in parallel even quicker. I never needed shore power at all. Once we camped in a more or less total shadowed place: the battery lasted min. 4 days without any charge! So, good enough.
High voltage solar panels have the advantage, that the cables do not need to transport high current which reduces the loss at the cables. You simply need just smaller cables*.
In total I spent 4.400 € for cables, battery, solar, charger, inverter, etc. which is fine since we don't have any costs on gas installation.
Energy Storage
We have 4 options to store energy:
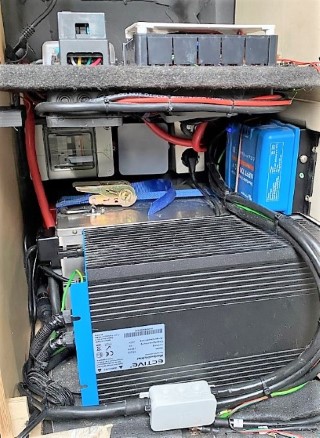
- Camper Battery: SHUNBIN 300 Ah LiFePo4* with Grade A cells and BMS with 300 A continuous current (max. 600 A). It was an experiment, but went well. Next time I would built it by myself with better components.
- Starter Battery: 100 Ah AGM. I didn't put anything on it which wasn't factory default. This battery is only to start and operate the Sprinter. Full stop.
- Auxiliary Battery: 100 Ah AGM. The sprinter was factory equiped with that. I use it as primary source for the radio, eMirror/dashcam, cockpit USB charger and a special use. I've added another small B2B Charger between the camper and the auxiliary battery to charge back the auxiliary battery if the camper battery is full. If this battery runs low, I can switch over all components to the camper battery.
- Hot Water 10 l in the boiler which can be heated by hot air or by 220 V/660 W.
Why is point 4 important to mention? If e.g. all batteries are full and I still get solar in, I can switch on the inverter and the boiler heating to 220 V to save more energy as long as there is an overflow. Otherwise the energy would be wasted and I would need to drain the battery later when I can't recharge for free.
Energy Consumers
There is not much special in terms of which kind of consumers we have on board:
- Some Lights: 2 x outside spots*, inside: a RGB LED* stripe with different segments, some regular LED stripes*, 6 LED spots*, 5 reading lamps (3 in bed area, 2 at the cockpit) with integrate USB charger
- Water Pump: Lilie Soft LP4142*
- MaxxFan Air*
- Fans: Nature's Head* toilet fan replaced by Noctua NF-A4x10 FLX*, 2 x 12 V fans* in the bed area
- Router: Teltonika RUT955* LTE router for cars
- Fridge/Freezer: Dometic CoolFreeze CFX 65W*, 60 l
- eValve: BACOENG AC/DC9-24V* for remote grey water disposal (should install one for fresh water too)
- Servo Motor: MG996R* for air distribution
- USB Charger: 7, vendor 1* & vendor 2*
- Diesel Heater: Planar 2D* with Planar Comfort Control* unit
- Motorized slide-out step: Thule V18, 12V, 550, Alu*
- Inverter: Ective SSI 25*, 2.5kW (max. 5kW) pure sinus with integrated shore priority circuit, MPPT (not used), shore power charger
- 220V - Coffee Machine: Melitta* (optional)
- 220V - Boiler: Boiler Elgena Nautic Compact Air LE 10*
- 220V - Induction Cooktop: K&H® Domino SLIDER Control VIN-3420SL*, 2 "flame"
- 220V - eBike Charger: 3 x
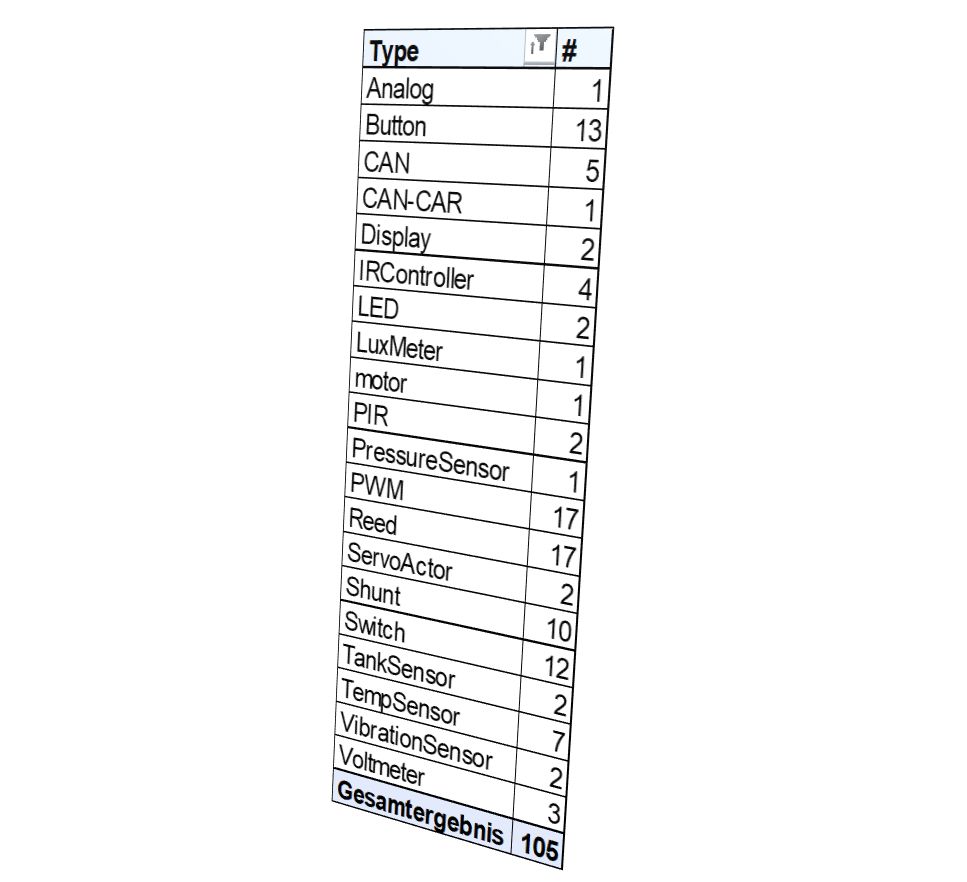
- smart: a lot of sensors, 5 x ESP32 controller, 2 displays
- Cameras: 360 Degree Surround Car Camera system* with front-/left-/right-/back-camera, AUTO-VOX V5* mirror dashcam 1080P front/back, regular rear view camera & grey water disposal camera on 9"Android 9.0 radio with Apple CarPlay dongle*... seems to be a lot of cameras?!
So appart from the cameras, nothing really special. And until that point, everything is well equiped but quite normal.
High Current Installation
The only thing is, that our setup needed to be planned and installed to deal with really high currents. If the induction cooktops run, the system easily drains up to 250-290 A. It would mean that my battery would be drained within an hour.
But that's not reality. Using induction results in much shorter timeframe to boil any fluid. E.g. water for 3 cups of coffee takes roughly 30 seconds. If you really cook on it, it consumes in the begining a lot of energy but then it needs just a fraction to keep the temperature.
But if this current is utilized, the whole energy chain needs to be built for it. That means really big cables, shortest possible cable ways and a very clean installation with high quality material. Additionally electrical and thermal isolation is lifesaving. I measured even at perfectly executed connection points temperatures up to 100°C! A lot of small electrons sequeezing through even the smallest bottleneck will produce that heat.
So, take care! If you are not 120% sure what and how to do it, ask a professional!
If you do it, test it with gradually increasing load and current. Measure everything. Voltage, current, temperatures - everywhere. E.g. just some fractions of Ohms can cause a significant cable burn. I learned that. Thanks god, it was during testing because it happend at a totally unexpected position. It was a ground potential difference problem between the Sprinter Chassis at the connection point and the battery. The current was searching for a balance which cause the burnout on a cable wich was not supposed to handle such a difference.
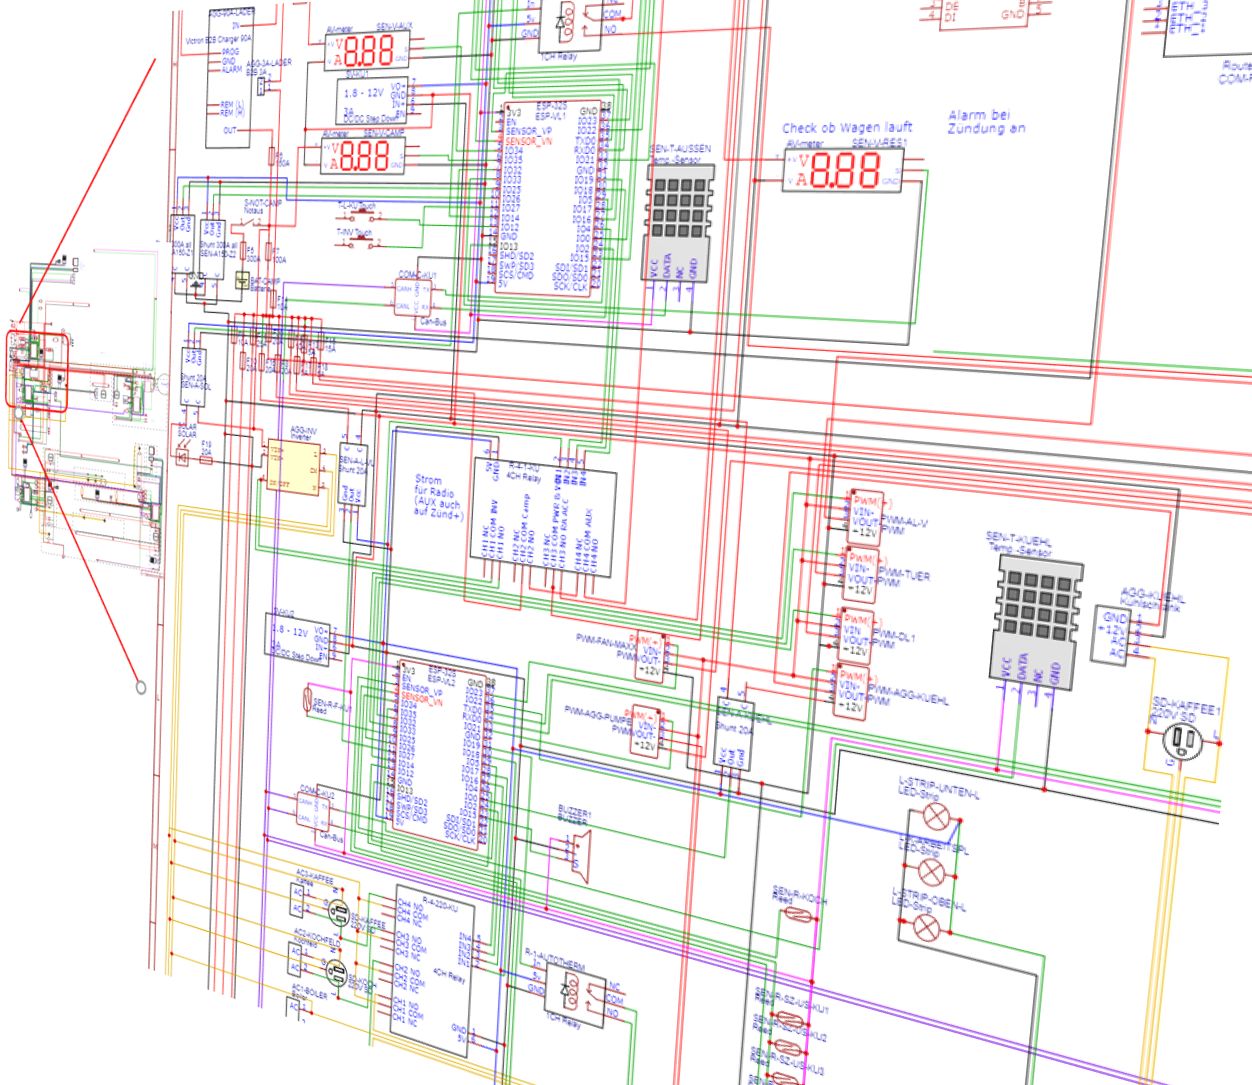
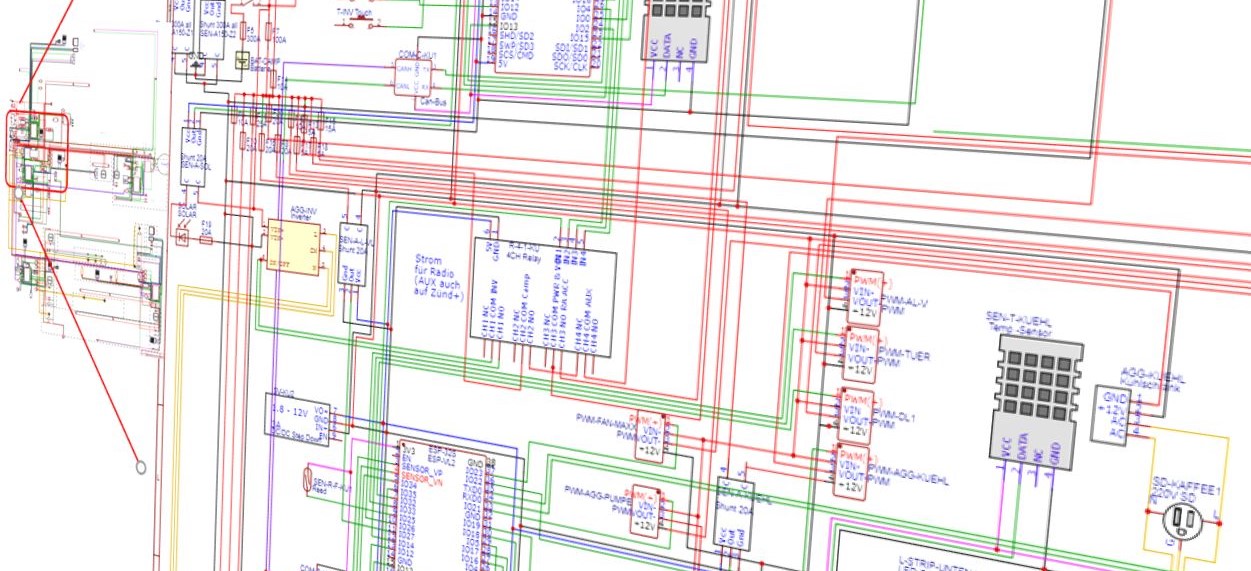
That's one reason, why you'll not find any electrical schema or plan here. Hope you understand that.
But to manage the energy flow, I needed something more intelligent. E.g. if the coocktops run, I shouldn't have the boiler running or the eBike chargers, should I? Except I'm on shore power, right?
The complex (p)art
Now it gets funny. But lets come back to that part later. It needs a bit more time to prepare.
For the time being just some impressions: